
How to Start a Successful Blog | Create WordPress Blog Today In 20 minutes
So, how to start a successful blog? Starting your own successful personal blog has never been easier. Even if you have no idea about code or web design you can build a fantastic personal or professional blog and have it online in around 20 minutes.
So there really is no excuse for not setting up that blog that you’ve been thinking about for so long. In this article, I show how to start a successful blog, and we walk through the entire process.

As a result, I will point out the common mistakes and help you get everything up and running.
Oh, and if you are wondering about costs – blogs can cost anything from $0 to $60/year.
The price depends on the platform you use. For instance, you can use a blogging platform free of charge while you’re learning the ropes.
Although paid-for hosting is the way to go in my opinion.
Why Start a Successful Blog?
So, let’s think about why you should start a blog at all. For example, when I started I wanted to help people avoid the pitfalls of building an online business and passive income.
However, your reasons are maybe probably totally different; it might be to inform people, to entertain, to expand your knowledge, or even to make enough money to quit your day job.
Here are some common reasons why people start blogging:
- Blogging consistently will improve your writing skills
- With a successful blog, you could make enough passive income to quit your day job – but you’ll need to find a niche
- A successful blog looks great on a resume
- If you have knowledge or expertise you can share it through your blog
- Blogging it’s a great chance to build your personal authority
- You can collect emails and promote whatever you want. Email is still the most reliable way to communicate online.
- It is a great way to make new connections and grow a business or social network
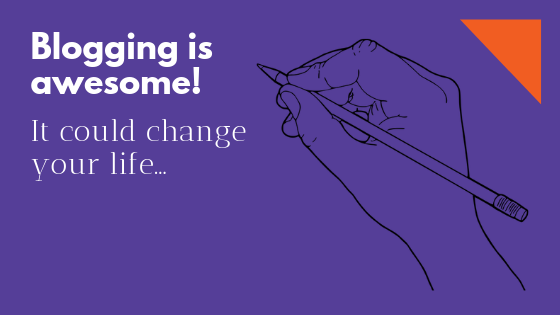
I could go on, but the bottom line is that blogging is awesome, it could change your life and it will increase your writing and reading skills.
So, how to start a successful blog? Let us jump in and walk through the entire process.
Is Your Blog Going To Be Free Or Self-Hosted?
This is the first decision you’ll need to take. You can start the blog for free and there are many platforms available online, such as:
Of course, they have some limitations, which we will talk about in a minute. On the other hand, you could choose to pay a small annual fee and self-host.
To get back to the point of the free platform, one of the key benefits of it is that they give you the ability to test the waters and try out new content and designs before you have to commit any money to the process.
However, there can be some issues – free is not always better – and below are some things to bear in mind if you are trying to decide which way to jump.
Free Blogging Platforms Limitations
- They are not really ‘free’ – they often have strict limits and control over the content
- They are businesses designed to make money from your content by selling ad space on your page
- Strict limits on free accounts mean that eventually, people will pay for premium plans that offer more functionality. However, these tend to charge over the odds and still have limitations and issues with functionality
- Design options are limited, even for the paid options, and there may be limits on traffic, storage, and poor customer service. There are often expensive up-selling practices on the platforms
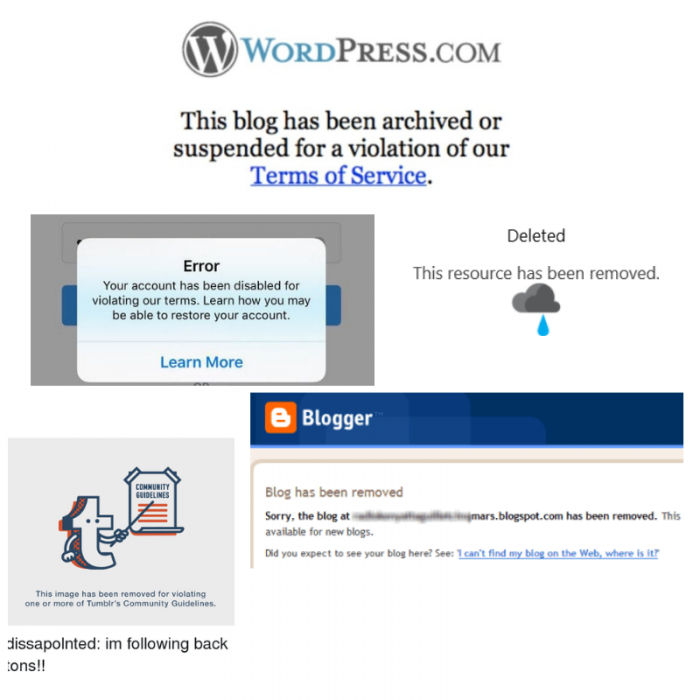
- Moderators monitor and control the meaning of the content so they can remove your site and you will lose all your data. If you have spent months building a blog and nurturing a following, perhaps monetization is starting to work well, this can be devastating
- Accidental violations of service can lead to the loss of your entire business with one click of a button
Imagine one day you lose your entire online business because of an accidental violation of the service agreement.
I’m assuming that these things are all the types of things you could really do without.
Well, that’s why successful bloggers tend to start out with a self-hosted blog and not a free one.
Why Successful Bloggers Start Self-Hosted Blogs
The alternative to months of hassle with the free platforms is to pay a small fee.
As a result, you get your own domain name (some providers offer the domain name for free) and there are none of the limitations you have on a free platform.
Certainly, having your own custom domain gives you an instant trustworthiness boost. Moreover, personal domains are usually far easier to remember than generic ones.
No limitations means, you can access great templates and plug-ins and design a site that looks really professional and it’s cheap.
Just pay a small fee, because a few months down the line it will be worth its weight in gold!
To Start a Successful Blog You Need to Get Web Hosting and a Domain Name!
So you’ve decided to go for it – good job! So now we can move on and look at the step-by-step way to launch a self-hosted blog.
First of all, you will need your very own domain name. This is the web address of your blog secondly, you will need to get your domain hosted on a server (web hosting) so that people can find your site online.
It sounds daunting but it can be completed in just 2 or 3 clicks. Yeah, it’s very easy!
Choose Best And Cheap Web Hosting
There are many web hosts out there but only a few of these offer a brilliant service, with some coming in as exceptional.
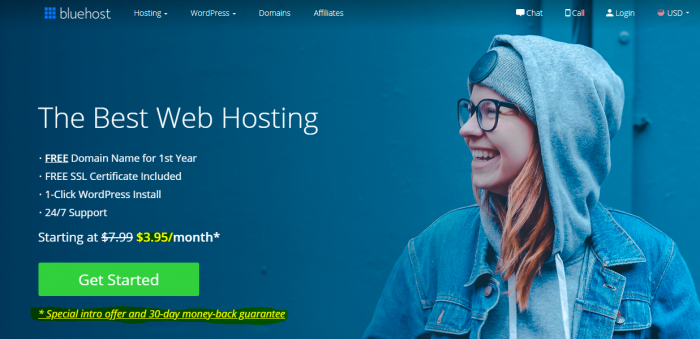
For a first-time blogger I would recommend you use Bluehost and here are my reasons:
- Bluehost is cheap, fast, and reliable
- Free domain name for the first year (value $11.99)
- Unlimited domains on one account
- It has many free features that will really enhance your blogging
- Bluehost powers over 2 million websites
- Every package includes a 30-day money-back guarantee in the (unlikely) event you’re not satisfied
- They offer a free SSL certificate (value $60+)
- Bluehost gives top-notch 24/7 live support
- And most of all it offers a one-click installation – you can get your blog online and launch in minutes
Web Hosting: How to Sign Up To Start a Successful Blog
If you are feeling keen just click “Get Started” and move on to the next stage ↓, and select proper plan for your needs.
Choosing Your Web Hosting Plan
My hosting plan of choice is Bluehost’s Choice Plus. Because Choice Plus is not only affordable but gives you a ton of ultimate hosting features such as:
- Spam experts
- Marketing offer (value $200)
- Unlimited websites, web storage, domains and subdomains
If you’re looking for an incredible shared hosting plan from Bluehost, you should definitely sign up for this plan.

The Choice Plus plan is a bit more expensive than their introductory plan but the longer the subscription the better value it gives.
However, if you’re a beginner or someone who is just getting started with blogging and looking for reliable yet cheapest hosting plans, a Basic shared hosting plan is definitely for you!
Choosing Your Domain Name
Bluehost offers every new customer a domain name for free for their first year. Many web hosts charge $14.99+ each year for the domain.
Look at something ending with .com, .net or .org. These are popular and visitors perceive them as more serious and professional.
So, once you have selected the plan you will see the “sign up now” page. There you have 2 choices:
- Get your free domain
- Sign Up with your existing domain

You may need to spend some time brainstorming for ideas especially if your first choice is not available.
Thinking out loud and experimenting with different combinations of words will help you find the right choice. Keep branding in mind and enroll family and friends for more inspiration.
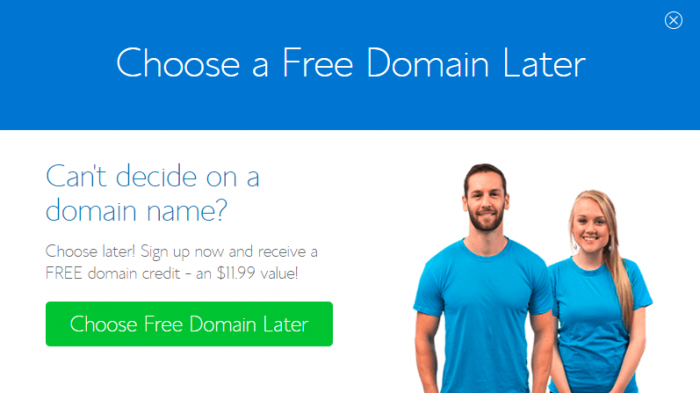
To clarify, it is OK if you can’t decide on a domain name right now. Just choose your free domain later! Simply move your cursor away from the window and you will see a pop-up.
That is to say, sometimes it’s hard to choose the right domain name that is suitable for your needs and availability. So, if you don’t know what domain name to use try these powerful brainstorming tools.
Once you have made your choice, press “Next” (or “Choose Free Domain Later”), create your account, and check product information data.
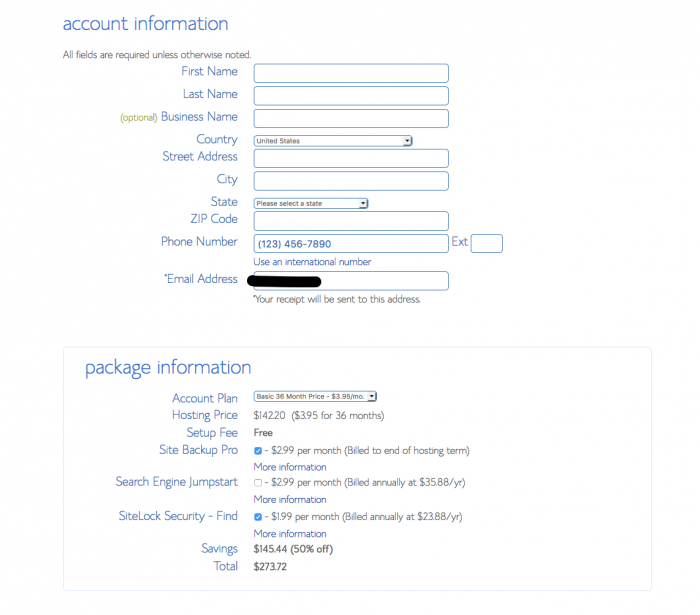
After that, simply pay using PayPal or your credit card.
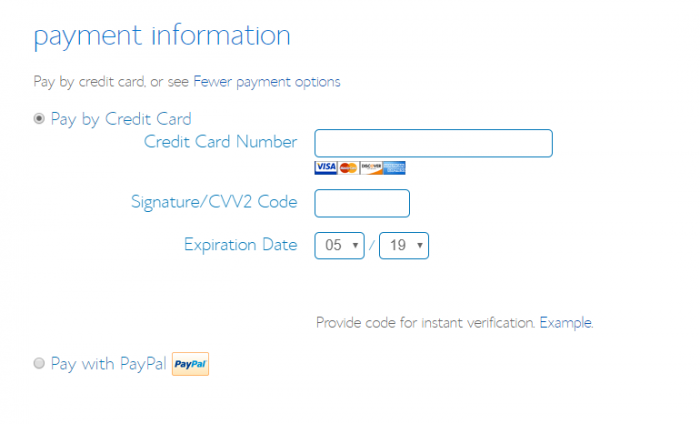
To clarify, while many hosts make you wait for activation, with Bluehost you can just jump straight in, the account activates immediately and you are now free to launch your blog.
Launching Your Awesome Personal Blog
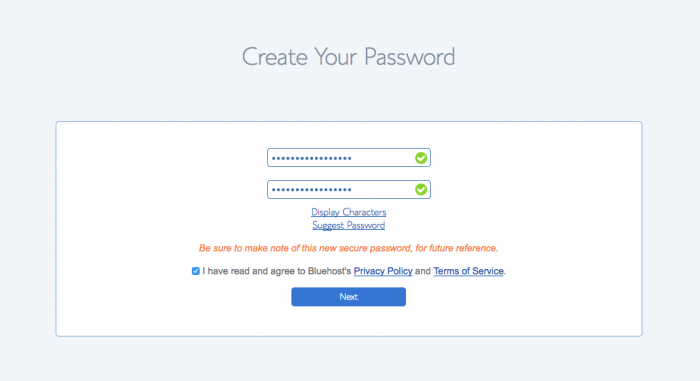
Once you have finished the registration process you will need to set up a password on the admin panel (cPanel), plus you need to choose a really strong password to keep your blog hacker-proof. Then you can log in via my.bluehost.com.
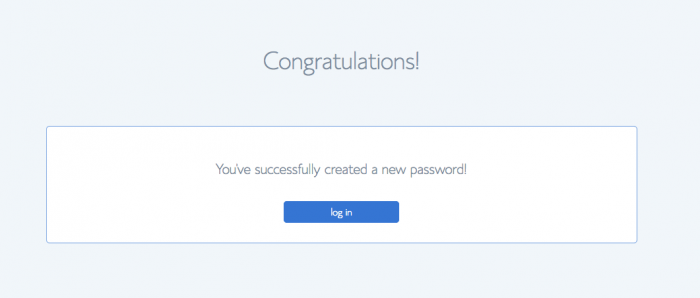
When you are ready press “Next”. After that, if everything was OK, you will see a message: Congratulations! If you see this, it means that you can log in to your Bluehost account.
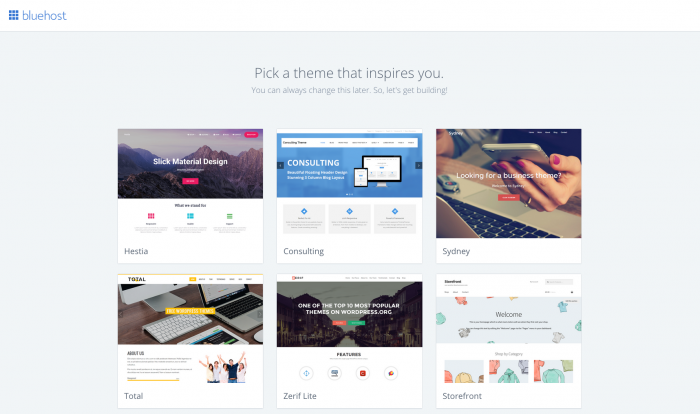
Next, do log in and Bluehost will prompt you to pick a theme that inspires you. But don’t worry you can always change this later. So, do this, pick a theme!
So you’ve done it – good job! My congratulations, now you can start building a blog!

However, there are still a couple of things you should do so that your blog is visible:
- Look at the left sidebar and find Settings
- Click Settings and then General
- Add your site title (your blog name), tag-line and description
- Make sure you change your site address to your personal domain name
- Add your contact email address (helps for resetting passwords, etc)
At the top of the WordPress dashboard, you will see Coming Soon. Click this and then click on Launch.
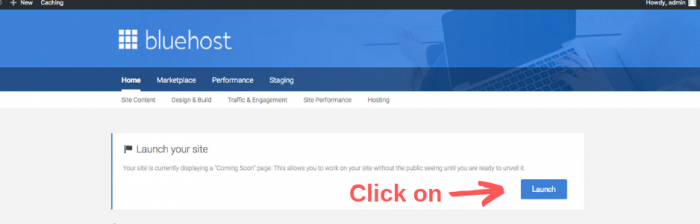
Awesome, you have just launched the blog but it is really just the bare bones that you can see online.
Now you’ve done all the set-up you can move forward onto the more exciting stage by customizing the look and feel of the site.
Make Your Blog Look Amazing! Time to start the design
There are a number of free themes available for use on the WordPress platform and these you can find in the platform’s theme library.
Choose a Theme and Layout
So installing a new theme is super easy. From your dashboard click Appearance and then go to Themes. At the top of the page is an Add New button, click on it.
After searching for a theme you can test it out by clicking Details & Preview which gives you the chance to compare multiple themes.
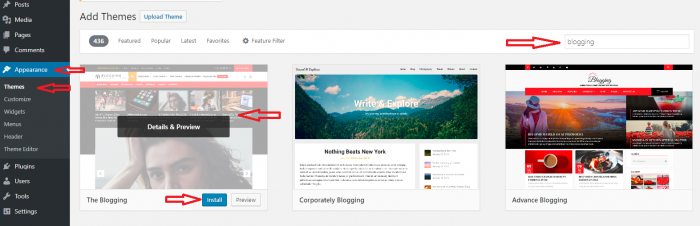
When you have settled on a theme, simply install it while in live preview by clicking on Install or in the main search area with one click of the Install button.
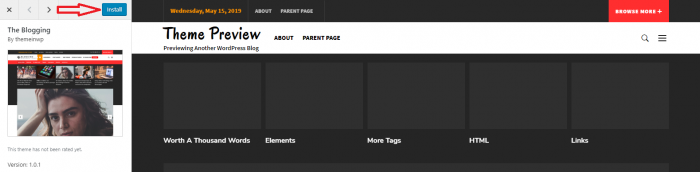
As soon as you activate the theme it is visible on the site and ready to use. You can now start posting content and building your base of loyal fans.
Managing Content: Blog Posts and Pages
You will notice that there is already a post on the site – this is the standard WordPress “Hello World” post, so you really need to add another one to put your stamp on the site.
Adding Blog Post
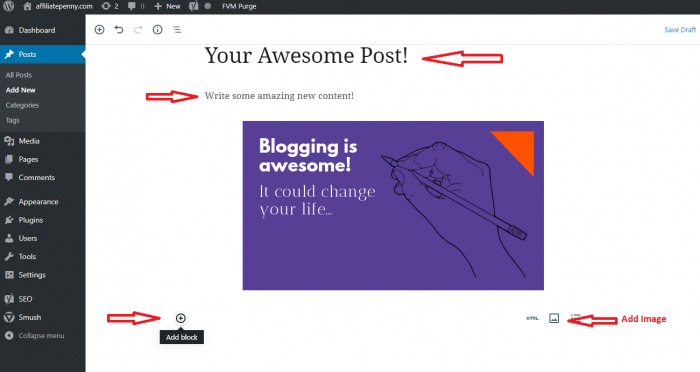
Adding a post is easy as well. Simply go to Dashboard. You will see Posts on the top left-hand side, click on it and then click Add New.

After this, you will be able to add a title and write some amazing new content. The platform has introduced the new Gutenberg editor, which allows you to add blocks. Let us click Add Block to introduce different types of content.
However, the editor has too many blocks and this is impossible to cover them all here so just click on a few and try them out.
Adding a featured image gives your post a bit of zest and interests the readers. On the right-hand side there is an Add Image box – just click, upload, and save.
Once you have given the post a final tweak or two and you are ready to publish just click on the publish button and you’re done! That first post is officially online!
Adding Blog Page
The site will be set up automatically to have the first page as a list of all your recent posts. If you would prefer a welcome page instead just follow these easy steps (very similar to post adding):
- Go to Pages (left-hand side) and click Add New
- Add the title and content to the new page and publish
- Repeat this to create another page for your blog posts (something self-explanatory like “Blog”)
- Publish the page
Once you have created both of the pages it is time to set up the welcome page.
Go to Dashboard, move onto settings, and from there to Reading. You will see Your Homepage Displays and the available options.
Just check the A static page, selecting your newly created home page. Under the Posts page setting, check the name of your blog page.
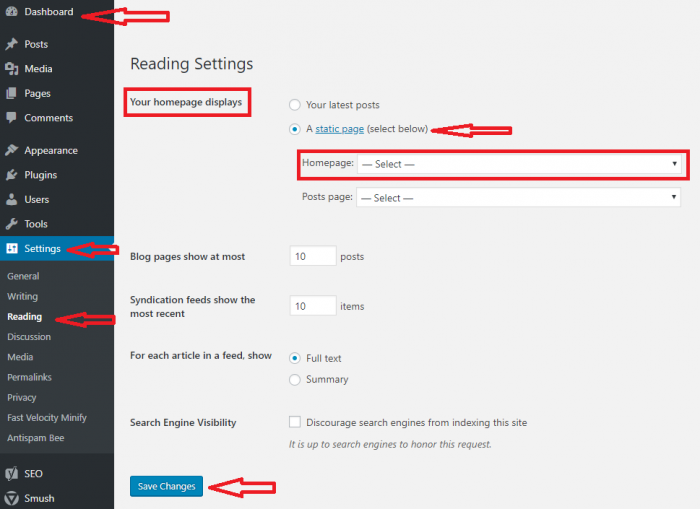
Once saved, your new visitors will see the Welcome Page as they arrive.
Creating a Menu
A successful blog must be user-friendly and the key to this is how well they can find what they are looking for. Navigation is important and a well-designed menu is your best friend.
WordPress makes it really easy to create a menu from the dashboard. Click Appearance > Menu.
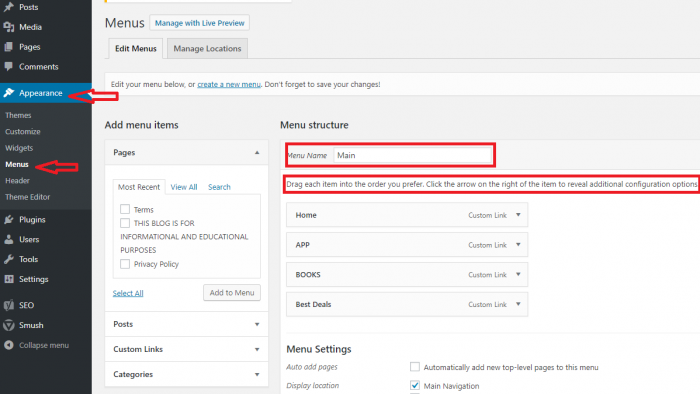
At this stage, you can add a new title for your menu and from the left-hand pane you can see all the pages on the site.
Click the ones you want in the menu and these will appear in the editor on the right. Customization is simple enough, just rearrange the order by clicking and dragging them up and down the list.
When you have settled on a structure and you are happy with it can be published in the main header by clicking on Primary or the equivalent name in your theme. Click Save and it’s all done.
To Start a Successful Blog You Need to Use the Plugins (and they’re FREE)
Plugins are free and they make it so simple to increase the functionality of your site, including increasing your monthly traffic and profits.
WordPress boasts a library of literally thousands of free plugins accessible from the WordPress platform and many more on other sites. I consider some plugins essential but before you can access these you need to visit your Dashboard and then click Plugins.
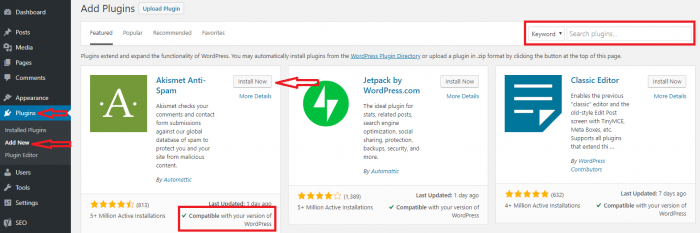
From here you can click on Add New and search for a plugin to meet your needs. Once you find it you just click install and activate it.
On activation, a plugin will create a new menu (or new sub-menu item in Settings) item for you to adjust its settings. You can find this in your dashboard.
Sharing Content Plugin
Initially, you want to install a plug-in that makes it really easy for your visitors to share your articles far and wide. If you install a social sharing plugin visitors will be able to promote your content directly from the post or page.
From Plugins, search for the keyword “social share” and get multiple results. Take a look at all the plug-ins available, install the one you like the most, and then set it up via its setting panel found in the dashboard.
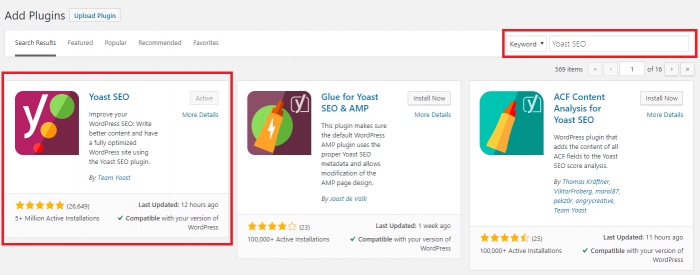
Yoast SEO Plugin
No doubt, every site needs some help with search engine optimization (SEO). For instance, on my blog, I use Yoast SEO Plugin, and I am very happy with it. In short, Yoast SEO is the original WordPress SEO plugin.
With this plugin, you get a solid tool set that helps you aim for that number one spot in the search results. Go to the Plugins > Add New and type “Yoast SEO”.
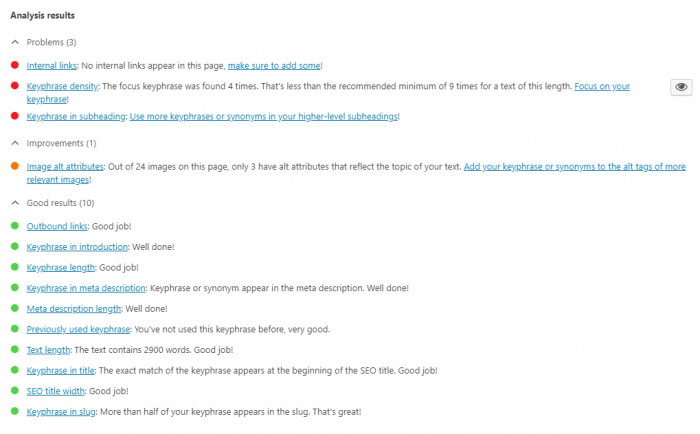
And this is how this plugin checks the posts.
Smush Plugin
Smush is image compression and optimization plugin. So, it will compress your images. As a result, you will save site bandwidth.
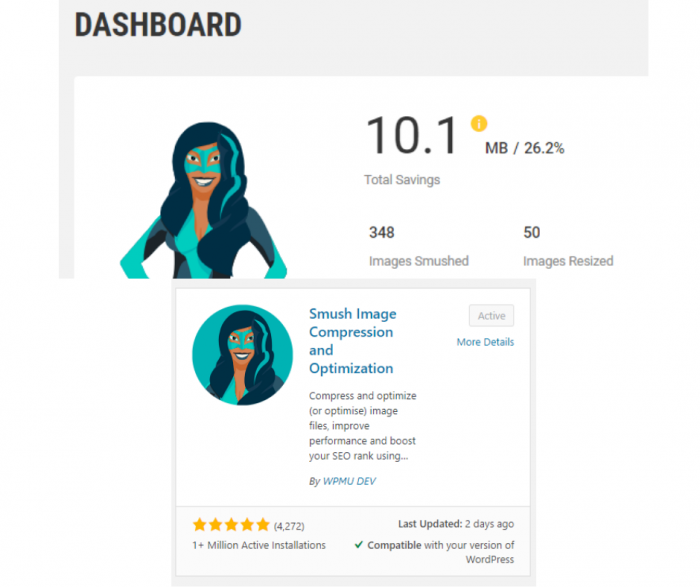
Resize, optimize and compress all of your images with the incredibly powerful and 100% free WordPress plugin.
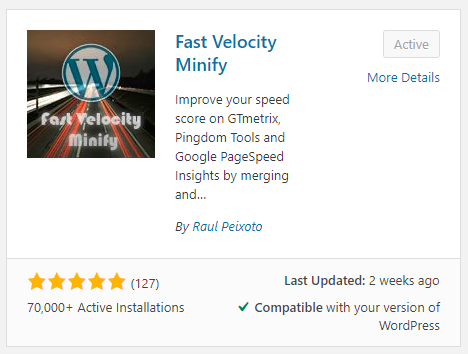
FVM Cache Plugin
To begin with, FVM Cache Plugin reduces HTTP requests by merging CSS & Javascript files into groups of files, while attempting to use the least amount of files as possible.
By the way, it minifies CSS and JS files with PHP Minify. So, there are no extra requirements!
In short, minification is done on the front end during the first uncached request. Once the first request is processed, any other pages that require the same set of CSS and JavaScript files will be served that same (static) cache file.
WordPress ClickFunnels Plugin (Optional)
Just if you use ClickFunnels, as I do, you may need this plugin. Otherwise don’t install it and read “What Is ClickFunnels” post if you want to know more about funnels.
Of course, make sure you read “How To Make Money With ClickFunnels” post. You won’t regret it!
So, you have decided to use this plugin. But, first, you have to test it on a test site. Because the plugin hasn’t been officially tested with new versions of WordPress.
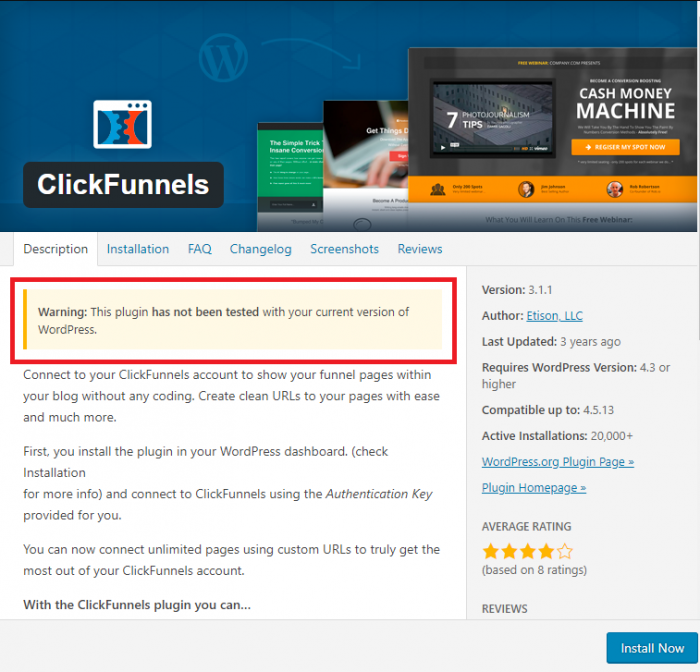
The plugin is useful if you want to show your funnel pages within your blog without any coding. So, you can:
- Create custom URLs for your pages
- Set any page as the homepage
- Set any page as a 404 page
- Show an order page
- Edit / Manage your pages
Installation of the ClickFunnels plugin is easy. In your WordPress dashboard go to Plugins > Add New and search for “clickfunnels” and you will be able to quickly install the latest version of the plugin.
Set Up a Personal Email Account
In fact, Bluehost allows you to create a domain-based email account as part of your web hosting account. So, this enables you to create names like support@yourdomain.com which are often seen as more professional by visitors.
In addition, you can use this custom email address in bulk email service for email automation. As a result, it will increase the email open rate!
Firstly, to set this up you need to log in to your Bluehost portal. There is a menu on the left, find Email & Office. From Basic Email, you will find the opportunity to See Options. Click here and then set up your account.
It will take seconds and once you create it click on Email accounts and then on Check Email.
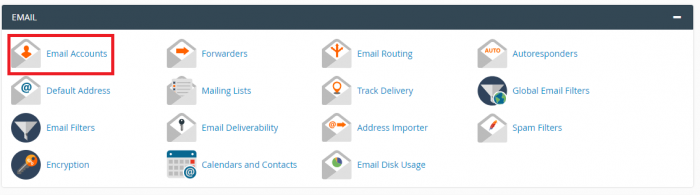

Secondly, confirm your credentials and you are now able to be able to send and receive emails from this new account.
Further, you can create an About page and keep there your contact information. The About page is a useful way to present your contact information and adding the email keeps all the contact from your website in one place.
Final Words
Above all, I am hoping this guide will have provided a comprehensive look at how to start your own successful blog. If you have followed the steps your new blog should now be up and running.
But, if you get stuck, confused, or just have a question about starting a blog, please feel free to contact me or leave a comment.
One more thing, the most common problem that blog owners have is a lack of traffic.
The major challenge lies in getting people to read your amazing content.
It means, that the best blog in the world is no use to anyone if they can’t find it. So, if you struggle to get traffic to your blog, read my How to Increase Traffic to Your Blog | Top Tips to Generate Traffic.
Good luck, enjoy and have fun with your new blog, and don’t forget about getting traffic!
If you find this post useful, please share it! It costs you nothing, and it feels great for us! Thank you!


Thank you so much for this tutorial. The tutorial is awesome!
I’m pretty new to the whole web blogging aspect of things. But, I will definitely use your tutorial…
Sure! Glad you like it!
Great article.Thanks for your great information. The content are quite impressive.INK for All has helped me improve tremendously. I’m just clueless when it comes to how to rank. INK for ALL is the first editor with AI assistance that’s free and I’ve come across that helps me out in this area. Sharing it here because it’s free and anything is worth a try.
Thank you, Donnie.
Good article! We are linking to this great article on our site.
Keep up the great writing.
Thank you biuro!
Hello! This is kind of off topic but I need some advice from an established blog.
Is it hard to set up your own blog? I’m not very techincal but I can figure
things out pretty fast. I’m thinking about creating my own but I’m not sure where to start.
Do you have any ideas or suggestions? Appreciate it
Setting up your own blog can be as easy or as difficult as you want it to be, depending on your technical skills and the type of blog you want to create. Here are a few options:
1. Using a blogging platform: If you’re new to blogging and don’t have much technical expertise, using a blogging platform like WordPress.com, Wix, or Squarespace can be a great way to get started. These platforms offer easy-to-use drag-and-drop interfaces and pre-made templates, so you can create a blog without needing to know how to code.
2. Self-hosted blog: If you have more technical skills and want more control over your blog, you can set up a self-hosted blog using a platform like WordPress.org. This option requires you to purchase a domain name and web hosting, but gives you full control over your blog’s design and functionality.
3. Hiring a professional: If you don’t have the time or skills to set up your own blog, you can hire a professional to do it for you. This option is more expensive, but can save you time and ensure that your blog is set up correctly from the start.
Overall, the level of difficulty in setting up a blog will depend on your technical skills and the type of blog you want to create. If you’re starting from scratch and want a professional-looking blog, using a blogging platform or hiring a professional may be the best option. But if you’re comfortable with technology and want more control over your blog, setting up a self-hosted blog can be a great way to get started.
Follow this blog post in order to setting up a WordPress blog in 20 minutes!